Advanced RFPs let you get gritty with the details. Add contractual requirements, list decision factors, include billing info, and specify meeting room size, setup, and times. This is also the best RFP for sourcing multiple suppliers for a citywide event. You can propose up to 12 date ranges, set up questions that only appear to certain supplier types, and easily communicate complex meeting room needs.
| NOTE: Just need to price some venues before planning the details? Create a quick RFP instead. |
1 Launch the RFP Wizard. Begin by clicking Manage RFPs in the top navigation bar, then Create New RFP.
2 Add the basic details. Select Advanced RFP, then click Next >>.
Name your RFP. Specify the Response Due Date and Decision Date by clicking  or typing in the provided fields. Choose a currency from the dropdown.
If your event will require multiple venues or services within the same city, select the appropriate radio button. This activates more citywide-specific options later in the wizard.
Consider adding a brief description and listing your decision factors in the appropriate boxes.
| NOTE: Don't want recipients to forward this RFP to other venues? Disable the forwarding feature by selecting No, only suppliers I send this RFP to can respond. |
Scroll down and enter information about the key contact for this RFP. The fields in red are required.
If you choose to receive an email notification every time a supplier bids or turns down your RFP, you can also add a co-worker to this notifications list. Click Add Recipient, choose Account User from the dropdown, and click the  icon in the Recipient field. When the pop-up appears, find their name and click Select on the left.
If you're a third-party planner and will receive commission, select the appropriate option and enter your rate.
| NOTE: Don't see these options? Contact your administrator to enable them for you. |
Click Add Section to create a text field where you can type in which portion of the proposal you are expecting commission for. If you want to request commission information on multiple portions of the proposal, create a separate text field for each one. You can add up to five sections.
| NOTE: Keep in mind suppliers are not required to match your demand. They can propose different commission rates for specific proposal sections, or offer no commission at all. |
Click Next >>.
3 Describe your event. Enter information about the organization holding the event. If you want to skip this section, type "Not Disclosed" in the required fields.
Enter your event's name and specify if the event format is in-person, hybrid, or virtual. Enter the estimated daily attendee count. If you are organizing a hybrid event, specify how many virtual versus in-person attendees will participate. To add a note about your attendees, click the  icon.
icon.
Add the start and end dates (excluding shoulder dates). If your dates are flexible, check the box (circled below) and enter alternate dates when the fields appear. Click Add Alternate Date to add up to 12 total. If this is a citywide event, an option appears below the date grid letting you require that suppliers respond with their availability for all your alternate dates.
Entering locations in the Destinations Under Consideration box will help NSOs forward your RFP to the right locations, but this field will be visible to all recipients.
Prove your requests are realistic by listing similar events you've planned. Scroll down and select the Yes, this is a repeat event that has taken place before option, then complete the fields that appear. Suppliers tend to respond quicker when they know you've done this before.
Click Next >>.
4 Add your room requirements. If you need sleeping rooms, click Yes at the top of the page, then enter the Check-in Date and click Apply.
| NOTE: If you want to create a meeting room-only RFP, select No so you can skip straight to defining your meeting room requirements. |
Room dates are listed by row in the grid below. Click Add Day to add another date, before or after.
Save yourself some typing by entering the number of rooms you'll need in one row only. Then, check the box for that row on the left. Click Copy, check the boxes beside the remaining dates in the dropdown, and click Apply. The rest of the fields will now match that row.
In the Meeting Room Requirements section, select Yes if you need meeting rooms or event space.
| NOTE: If you want to create a sleeping room-only RFP, select No next to "Do you need meeting rooms or event space?" so you can skip to the Meeting Packages section. |
Not sure how much space you need? Find out with the  Space Calculator.
Click Add Item to start creating your agenda.
Name your agenda item and select its type from the dropdown.
Check the box next to the date when the meeting session will take place and select a start and end time.
To make this a recurring session, you can check the boxes next to each of the event dates when the session should take place.
Additionally you can create several copies of this agenda item per day. For example, if you want to split your attendees into three separate classrooms that will take place simultaneously, you can create an agenda item and type three in the "Copy this item" field.
In the Room Requirements section select the agenda item setup type from the dropdown, then specify the room size and the number of people it will accommodate.
Once you're done, click Save, or Save and Add >> to include more.
Consider specifying your meeting room peak, food and beverage budget, audio/visual needs, or any additional information in the appropriate boxes.
In the Meeting Packages section specify whether you prefer venues to respond with meeting package pricing.
| NOTE: Keep in mind that venues are not required to provide meeting package pricing irrespective of what option you choose. |
Click Next >>.
5 Choose the costs suppliers must provide. You might be indifferent about the cost of a continental breakfast but need that exhibit space quote. If you have the Proposal Preferences feature, you can configure how each cost should be included in proposals.
Your choices include:
- Optional - lets suppliers fill out the field or leave it empty.
- Required - won't let suppliers send their proposal unless the field is filled.
- Hidden - removes the field from the RFP so suppliers don't waste their time.
Click Next >>.
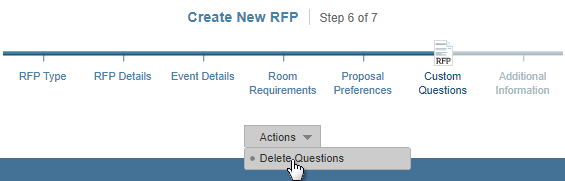
6 Choose your custom questions, if applicable. If you've created default questions, they'll be listed in this step. Change the order the questions appear using the arrow buttons  or click Delete to remove one. To remove questions in bulk, start by clicking Actions, then Delete Questions.
You can also add questions to your RFP after you've completed the wizard.
If this is a citywide RFP, you'll be able to target your questions to specific suppliers once you complete the wizard. For example, only convention centers will get your question about move-in costs and only hotels see the one about the menu.
Click Next >>.
7 Include additional details and attach documents. Finally, consider listing your concessions, contractual requirements, and billing information in the appropriate boxes.
If this is a citywide RFP, you can indicate whether your organization lets you accept rebates or incentives, and if so, how much.
To upload files in your RFP, click Browse... to select a file from your document library, or click Choose File to select a file from your computer or network. When the pop-up appears, locate the file and click Insert or Open. Back in Cvent, click Upload File.
| NOTE: Don't see the option to upload files? Contact your sales representative to learn how you can purchase a venue sourcing package that allows you to attach documents to your RFPs. |
Once you're done, click Next >>.
Your RFP is now complete. When you're ready, you can add venues and send your RFP or go back and edit the details.