Allocations track the spend of a particular category with a strict monetary limit. The allocated category is broad and gets broken down into smaller subcategories, like a medical category with training, equipment, and gifts subcategories. Once these are set up, you can track them within your event's or RFP's budget while also pulling them into reports.
Creating Allocations
1 Create a budget allocation category. A budget allocation category defines what is being allocated. An area, like medical, politics, universities, and members, can have a fixed amount of spend for a budget.
Begin by hovering over the global navigation, then click Admin. From the Admin navigation, hover over Budget, then click Allocation Categories. Click Create Allocation Category.
Name your allocation category. Optionally, add a description in the Internal Note text box. If your account has multiple languages enabled, add any translations you wish to make.
| NOTE: You cannot delete an allocation category once it is created, but you can deactivate it. |
Click Save.
2 Add a budget allocation subcategory. Allocation subcategories allow you to break up the categories into manageable and specific chunks, like spend per person, school, or product.
From the Admin navigation, hover over Budget, then click Allocation Subcategories. Click Create Allocation Subcategory.
Choose the allocation category, then give your subcategory a name.
If your account has multiple languages enabled, add any translations you wish to make.
| NOTE: You cannot delete an allocation subcategory once it is created, but you can deactivate it. |
Click Save.
Associating Allocations to a Budget
1 Access the budget items in an event. Begin by over hovering over the global navigation, then click Events. Select your event. From the Event navigation, hover over Planning, then click Budget.
Or, access the budget items in an RFP. Begin by hovering over the global navigation, then click Admin. From the Admin navigation, hover over Sourcing, then click RFPs and select your RFP. From the Event navigation, click Budget.
2 Individually add allocations. Click the desired budget version. The Budget Items tab opens by default. To add allocations to an existing budget item, click the  icon to its right, then click Allocations.
Determine whether you want to allocate the item by percentage or, if you added the finalized item cost in the Actual column, by amount. Click Add Row.
Depending on your budget's configuration, select the allocation subcategory or GL code from the dropdown. You can add as many rows as you need.
Add the percentage or amount for each row. To distribute the percentage or amount equally across all rows, click Distribute evenly.

When you're finished, click Save.
To add allocations to a new budget item, click the tab to the right, Allocations, then click Add Budget Item. Enter the budget item details.
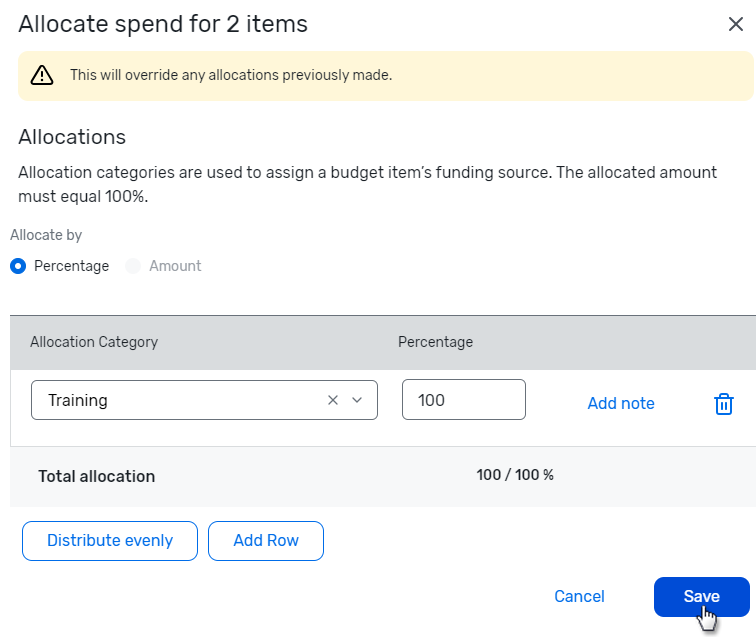
Or, add allocations in bulk. The Budget Items tab opens by default. Check the boxes next to the budget items you want to allocate in bulk. Click  from the gray banner at the top, then select Bulk Allocate.

Click Add Row and select your allocation category from the dropdown. Assign a percentage and click Save.
| NOTE: You can only bulk allocate budget items by percentage. |
3 View allocations. Need to know how much you have already allocated? Click the tab to the right, Allocations. Here you can view allocations by currency, filter by allocation category and allocated amount, and change the grouping, subgrouping, and columns that appear in the table.
To report on budget allocations, being by hovering over global navigation, then hover over Insights and click Event Reports. Click the Report Templates tab if necessary, then click Budget Allocation to run the report.